Want to know how to take better photos with your phone?! Did you know 95% of my Instagram and blog images are taken on my phone?! (iphone 8+) It’s just SO quick and easy and even though I have a very *expensive camera that I paid a lot of money for (well, actually my student loan did, thank you government) I would much rather take my images with my phone these days.
There’s a lot of reasons behind that.
One being that especially for Instagram you don’t NEED a higher quality photograph than that from a phone. Your Instagram images are rarely ever blown up big. They are a small square or 4X5 image on a smartphone or tablet, and as long as you have great lighting and a steady hand those photos will always be good enough for the gram.
Another reason is just how quick the turn around is. No sending your camera’s images via Wifi or plugging in your SD card to your laptop, to then have to get the photos from your laptop to your phone (oh and when will Instagram allow us to upload from desktop?!). I literally take a whole bunch of photographs, open them up straight into my Lightroom app, bang my favourite preset on and bobs your uncle it’s ready to be uploaded to Instagram.
So if you’re like me and want to get better at using your phone to capture your images for your blog/insta, or perhaps you just want to know how to take better photos with it, then here are my best tips!
(I have an iPhone 8+, so perhaps these tips might not work on older iPhones or androids, but might be worth a try!)
Turn on Grid Mode
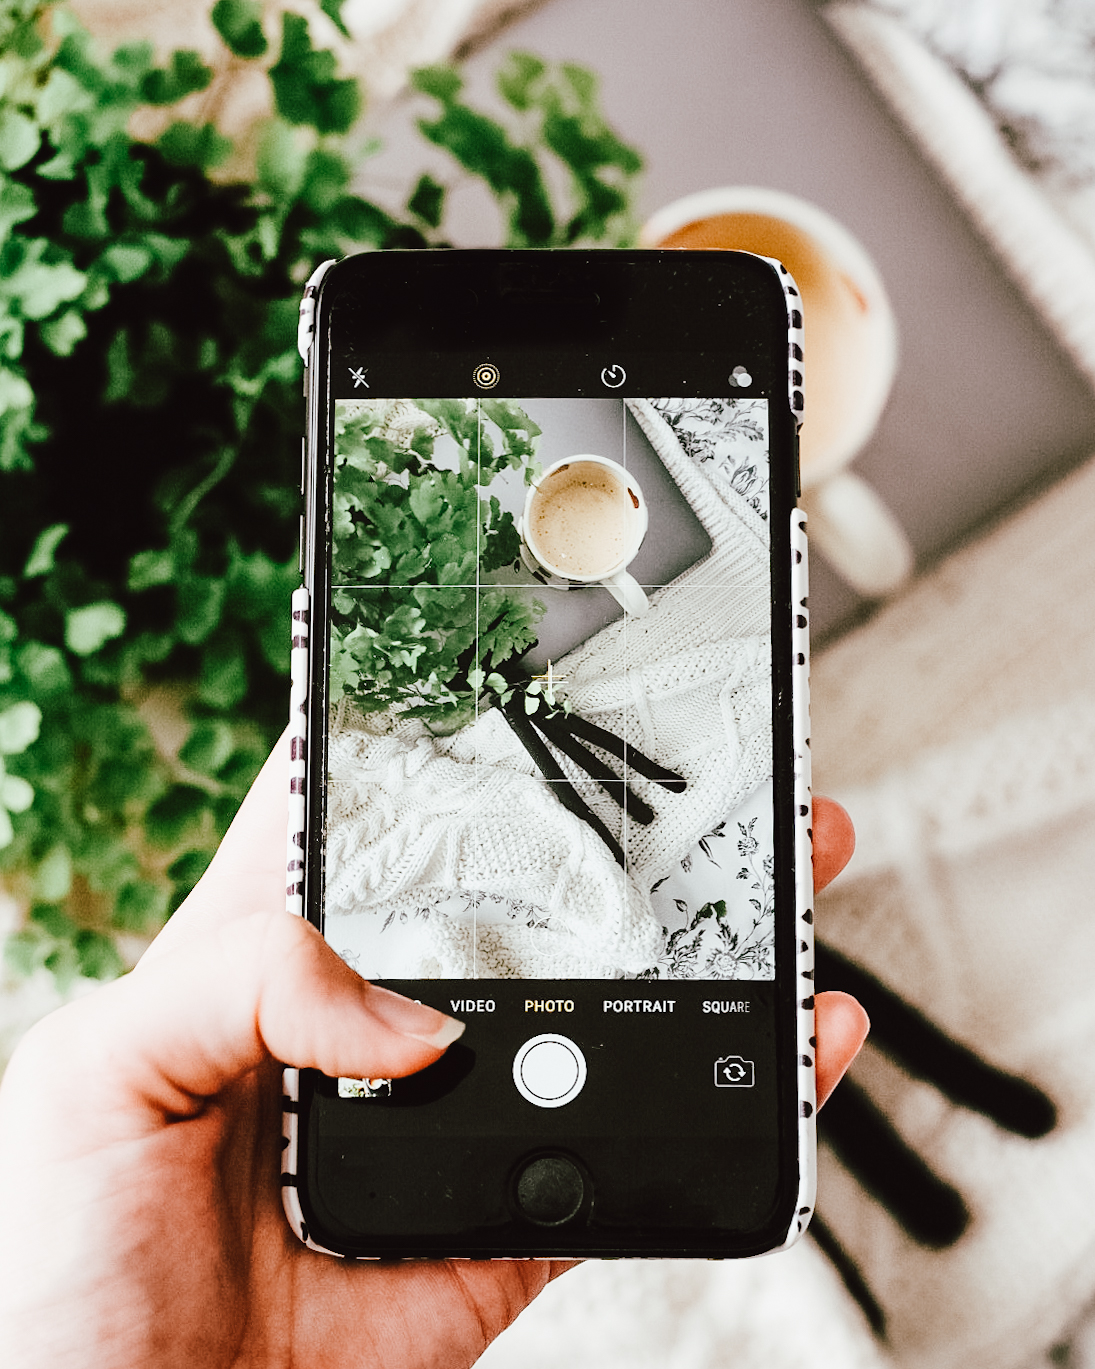
This has to be my number 1 MUST. Not only does it give you a 3X3 grid which will help you massively with composition, it also gives you a little + in the middle when you are taking images above. PERFECT for flat lays. You just need to line up your yellow + with the central one and you will get a spot on over the head image. No more looking back over photos thinking they’ve been taken at funny angles.
To do this on an iPhone, go into your settings, scroll down to ‘camera’ and turn on ‘grid’.
Natural Lighting
If I learnt one thing from studying photography it’s that ambient lighting will ALWAYS be better than artificial. Photographing in a nicely lit room will not only make your photos a better quality but will make them easier to edit too. I’m not saying don’t use artificial lighting, because sometimes that can help. But your best thing is to open up your curtains and blinds wide and try photograph close to a window.
Use a Phone Tripod and Remote
I only recently got myself one of *these and boy has it changed how I photograph. You definitely need one of these if you take a lot of photographs of yourself. No more balancing your phone on a pile of books, setting self-timer for 10 seconds and waiting impatiently. Now your phone will sit comfortably and straight and you can hold the tiny Bluetooth remote and just keep constantly snapping. You’ll soon learn how to hold the remote so it’s not seen in images too. Though sometimes I forget and have to quickly edit it out on Lightroom.
This is the *tripod I have and love!

Shoot Action Shots with Live Photos ON
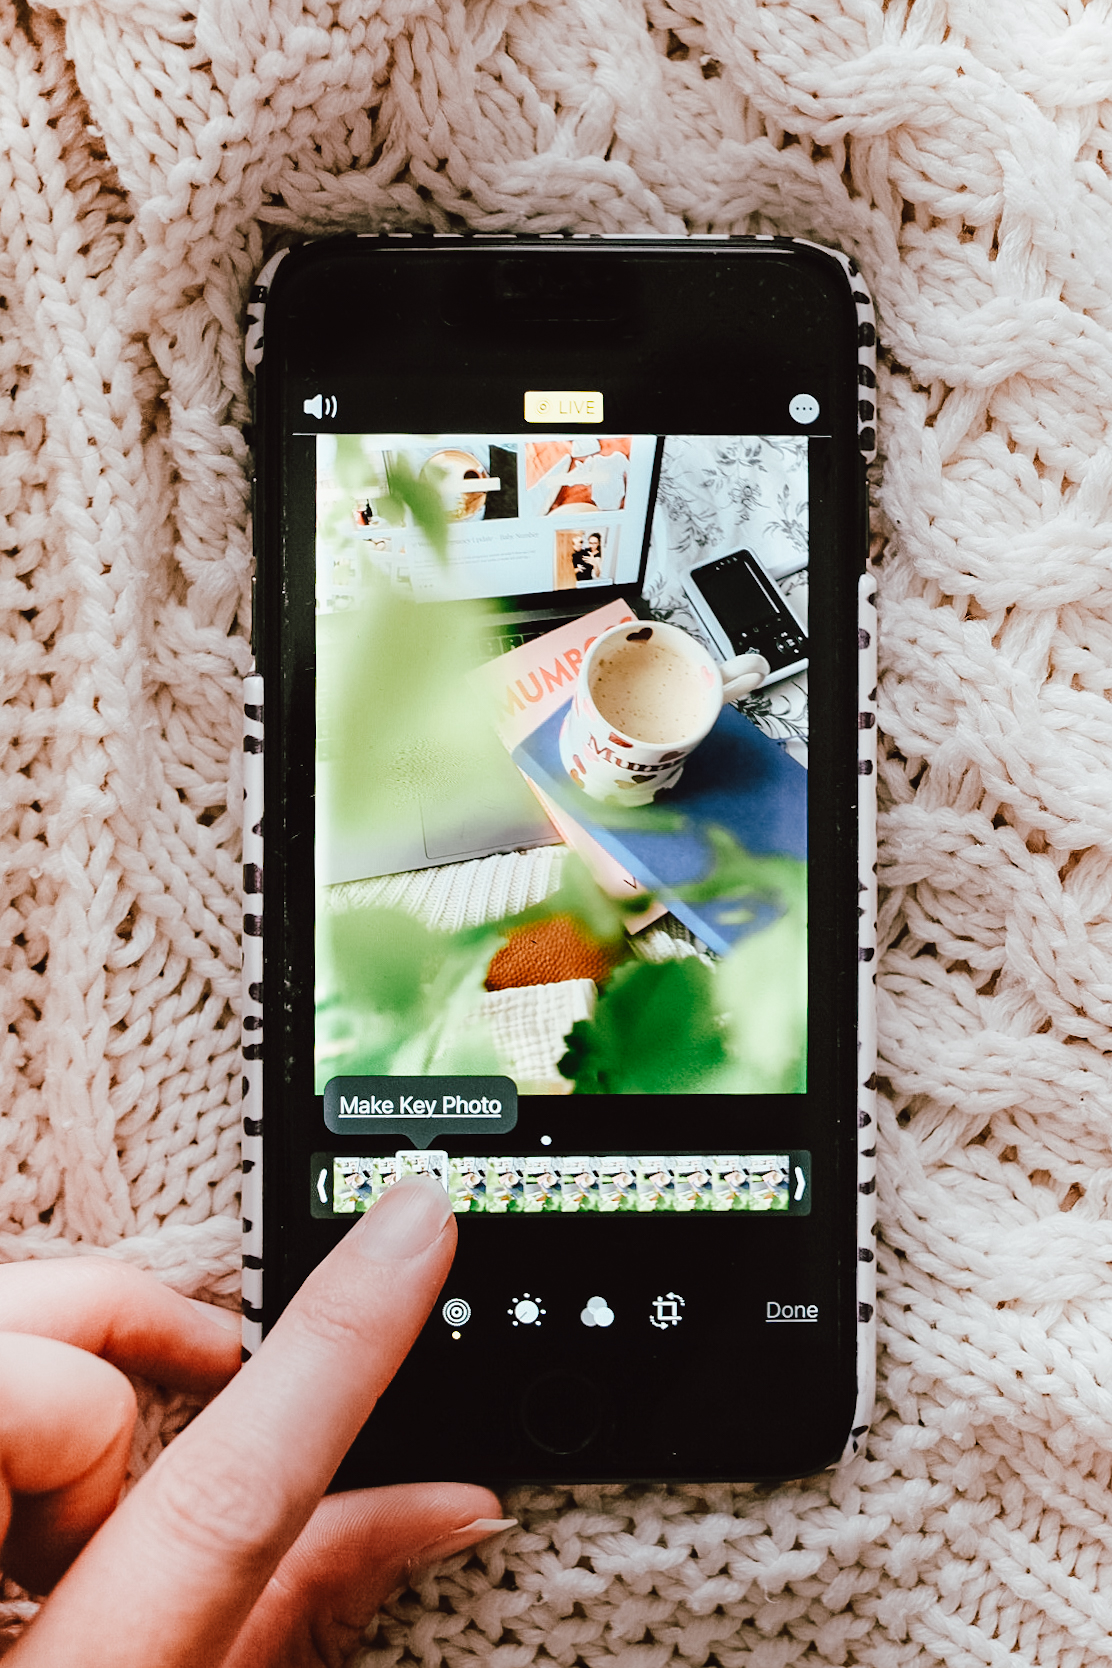
This setting is a godsend with a crazy toddler. Once you’ve taken your image, click edit and then on the left ‘live photo’ icon. This will give 12 frames before and after you clicked the shutter, select one and click ‘Make Key Photo’. Meaning if someone has closed their eyes, moved their arms you can easily see if there is a suitable more focused less blurred image!
Use the Back Camera
The main camera on the back of your phone is of SO much higher quality than that of your selfie camera. I rarely use the selfie camera unless I’m just taking selfies for fun and NOT for Instagram/Blog. If you’re wanting to take a selfie to post then either use the tripod method above, or sit in front of a mirror, have the back camera pointing at you, and use the mirror to see what you look like.
I also use a little standing mirror when using my phone tripod! This way I can always see what I’m taking and how its framed instead of constantly having to go look at the previous image and see what needs changing.
Don’t Use Flash
As I said, it’s all about natural lighting. Artificial can be okay and work in your favour but the built-in flash on your phone is not going to improve the lighting situation.
Please Don’t Zoom
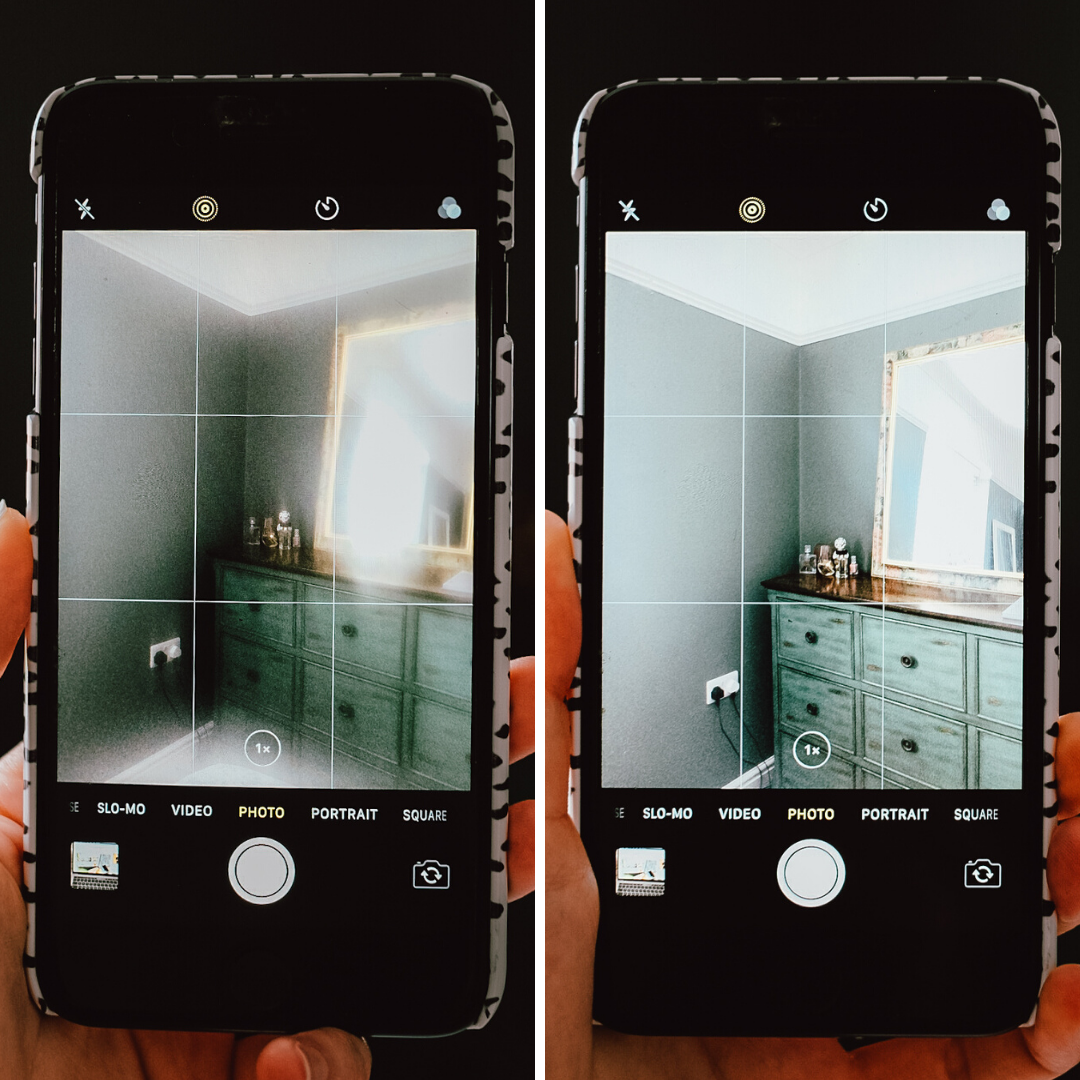
If you want to be closer up either stand closer OR crop the image after. Phone cameras aren’t built for zooming. It decreases the image quality massively. The lenses on these phones are nothing like a real camera lens, your lens isn’t actually zooming in, the phone is just stretching what it already sees.

Clean Your Phone Lens
So many times I’ve gone to take a photo and thought “why is it all misty?” usually because I’ve gotten some kind of substance (food) over my lens. I find this happens a lot too with using beauty products or hair spray. Give your lens a nice little wipe over with something clean and dry and you will notice a huge difference in image quality.
Let me know if these tips have helped you at all! I’d love to see if they’ve improved your photos at all. If you try these out and post to Instagram be sure to tag me (@caitylis) so I can see! I’d love to see your images!
*= Affiliate Link. I get a small commission if you purchase through this link, it doesn’t cost you any extra at all. It just helps keep this blog running (to learn more read my disclaimer)

I love the live function, especially with a toddler who doesn’t stay still for more than 0.0000001 seconds!
So many great tips and advice here! Going to come back to this when I take my next bunch of photos x
Great tips, thank you! I always forget to clean the lense then wonder why it’s a horrible photo!
Hust bought the tripod you recommended after nodding along & laughing at the whole ‘balance books on pile of books ‘ line! 😂😂 LOL!
Will take this post into account when I’m busy using my new tripod!
Thank You!
I love these tips!
I’m hoping to buy a new iPhone soon so that I get the new features (I’m still on iPhone 7).
Your photos are amazing x